The Robot Testing Pattern
Robot Testing Pattern
Okay, so this can seem an overkill but here me out… If you use design patterns in production code, then why not in our tests?
Thinking logically, we use design patterns to ensure maintainability, readability, flexibility and many other reasons. For these reasons alone, they confirm that design patterns should be considered for testing code and logic too.
Incoming, the Robot Pattern… A simple yet effective pattern that ensures readability, minimal duplication and performant tests. We can use this in both UI testing and Unit testing. So, let’s see what it looks like.
So to begin with, I can confirm we do not need any libraries. We will create a very simple project, and create robots for testing our UI and our logic.
First our dependencies are added to build.gradle.
    implementation 'androidx.core:core-ktx:1.2.0'
    implementation 'androidx.constraintlayout:constraintlayout:1.1.3'
    implementation "androidx.lifecycle:lifecycle-viewmodel-ktx:$lifecycle_version"
    implementation "androidx.lifecycle:lifecycle-livedata-ktx:$lifecycle_version"
    implementation 'androidx.activity:activity-ktx:1.1.0'

    testImplementation "androidx.arch.core:core-testing:$arch_version"
    testImplementation 'junit:junit:4.12'

    androidTestImplementation 'androidx.test.ext:junit:1.1.1'
    androidTestImplementation 'androidx.test.espresso:espresso-core:3.2.0'
    androidTestImplementation 'androidx.test:runner:1.2.0'
    androidTestImplementation 'androidx.test:rules:1.2.0'
Next, we need to create a simple UI that looks like the below.
activity_main.xml
<?xml version="1.0" encoding="utf-8"?>
<androidx.constraintlayout.widget.ConstraintLayout xmlns:android="http://schemas.android.com/apk/res/android"
    xmlns:app="http://schemas.android.com/apk/res-auto"
    xmlns:tools="http://schemas.android.com/tools"
    android:layout_width="match_parent"
    android:layout_height="match_parent"
    tools:context=".MainActivity">

    <TextView
        android:id="@+id/textCount"
        android:layout_width="wrap_content"
        android:layout_height="wrap_content"
        android:text="0"
        android:textSize="30sp"
        android:textStyle="bold"
        app:layout_constraintBottom_toBottomOf="parent"
        app:layout_constraintLeft_toLeftOf="parent"
        app:layout_constraintRight_toRightOf="parent"
        app:layout_constraintTop_toTopOf="parent" />

    <Button
        android:id="@+id/buttonDecrement"
        android:layout_width="wrap_content"
        android:layout_height="wrap_content"
        android:layout_marginStart="45dp"
        android:layout_marginEnd="64dp"
        android:text="Decrement"
        app:layout_constraintBottom_toBottomOf="@+id/textCount"
        app:layout_constraintEnd_toStartOf="@+id/textCount"
        app:layout_constraintStart_toStartOf="parent"
        app:layout_constraintTop_toTopOf="@+id/textCount" />

    <Button
        android:id="@+id/buttonIncrement"
        android:layout_width="wrap_content"
        android:layout_height="wrap_content"
        android:layout_marginStart="64dp"
        android:layout_marginEnd="45dp"
        android:text="Increment"
        app:layout_constraintBottom_toBottomOf="@+id/textCount"
        app:layout_constraintEnd_toEndOf="parent"
        app:layout_constraintStart_toEndOf="@+id/textCount"
        app:layout_constraintTop_toTopOf="@+id/textCount" />

</androidx.constraintlayout.widget.ConstraintLayout>
Now that we have our view, we can create the code. We will use a simple Activity, ViewModel and ViewState.
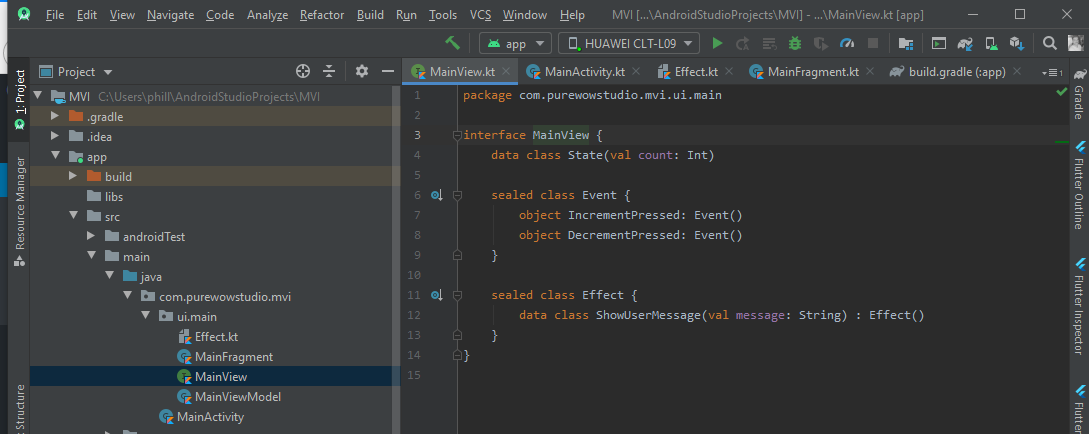
MainView.kt
interface MainView {
    data class ViewState(val count: Int)

    sealed class Event {
        object IncrementPressed: Event()
        object DecrementPressed: Event()
    }
}
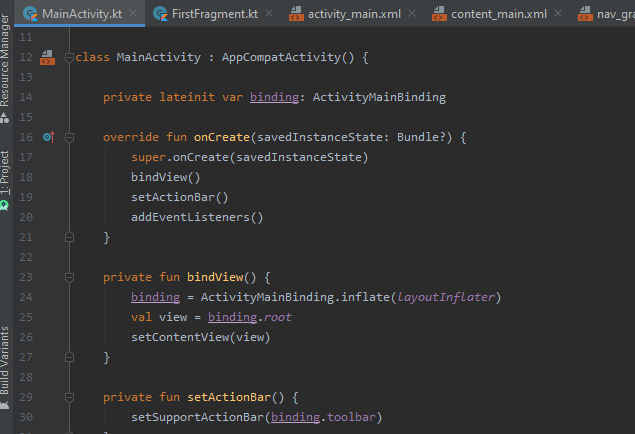
MainActivity.kt
class MainActivity : AppCompatActivity() {

    private val viewModel: MainViewModel by viewModels()

    override fun onCreate(savedInstanceState: Bundle?) {
        super.onCreate(savedInstanceState)

        setUI()
        observeViewModel()
        addEventListeners()
    }

    private fun setUI() {
        setContentView(R.layout.activity_main)
    }

    private fun observeViewModel() {
        viewModel.getViewState().observe(this, ::updateUI)
    }

    private fun updateUI(viewState: ViewState) {
        textCount.text = "${viewState.count}"
    }

    private fun addEventListeners() {
        buttonIncrement.setOnClickListener {
            viewModel.onEvent(IncrementPressed)
        }

        buttonDecrement.setOnClickListener {
            viewModel.onEvent(DecrementPressed)
        }
    }
}
MainViewModel.kt
class MainViewModel : ViewModel() {

    private val viewState: MutableLiveData<ViewState> = MutableLiveData()

    fun getViewState(): LiveData<ViewState> = viewState

    init {
        updateViewState(ViewState(0))
    }

    fun onEvent(event: Event) {
        when (event) {
            is IncrementPressed -> incrementCount()
            is DecrementPressed -> decrementCount()
        }
    }

    private fun updateViewState(state: ViewState) {
        viewState.value = state
    }

    private fun incrementCount() {
        viewState.value?.let {
            updateViewState(it.copy(count = it.count + 1))
        }
    }

    private fun decrementCount() {
        viewState.value?.let {
            updateViewState(it.copy(count = it.count - 1))
        }
    }
}

Okay, so that is the basics for a very simple app. We have 2 buttons, one that increases a count. The most basic of all tutorial apps! It might seem like an over kill using a ViewModel + Activity for this, but with the latest android-ktx libraries, we simply create a ViewModel and instantiate it in the Activity and drive events as we would in a default MVI manner.
Very simply put, there is 2 actions that we need to ensure happen, when the Increment button is pressed, we increase the number on screen by 1, if we press decrement, we decrease the number by 1. No other logic required, we can go into minus, we can go to an unlimited number.
So, put simply, we can write a couple of tests that will confirm this. For the purposes of this blog post I will write a UI test to ensure this happens, and also a mirrored Unit test (Usually wouldn’t duplicate in this manor, but for the sake of showing the pattern in both Instrument based and JVM based testing in practice.
Okay, let’s being the testing. For a the Robot Testing Pattern we have 2 classes to create, one is our Robot and the other is the actal Test class itself. For this example will be using JUnit4Runner & JUnit.
So, let’s write our first robot…
/androidTest/MainActivityRobot.kt
 class MainActivityRobot {

    fun givenTheCurrentValueIsZero() {
        // NO OP - Default is Zero
    }

    fun whenTheIncrementButtonIsPressed() {
        onView(withId(R.id.buttonIncrement)).perform(click())
    }

    fun whenTheDecrementButtonIsPressed() {
        onView(withId(R.id.buttonDecrement)).perform(click())
    }

    fun thenVerifyCountIs(amount: Int) {
        onView(withId(R.id.textCount)).check(matches(withText(amount.toString())))
    }
}
Very simply, we wrap our tests and Espresso commands in functions, name them respecfully in terms of Given, When, Then and it’s simple as that… That’s it, that’s your robot finished…
Obviously the test isn’t wrote or complete yet, but there’s not really much to it. Simply write your tests like your normal, but calling the robot for the test paramater your looking for, heree’s an example below.
/androidTest/MainActivityTest.kt
@RunWith(AndroidJUnit4::class)
@SmallTest
class MainActivityTest {

    @get:Rule
    val activityRule =
        ActivityTestRule(MainActivity::class.java)

    private val robot = MainActivityRobot()

    @Before
    fun setup() {
        robot.setup()
    }

    @After
    fun shutdown() {
        robot.shutDown()
    }

    @Test
    fun givenIncrementButtonIsPressedOnceNumberEqualsOne() {
        with(robot) {
            givenTheCurrentValueIsZero()
            whenTheIncrementButtonIsPressed()
            thenVerifyCountIs(1)
        }
    }

    @Test
    fun givenDecrementButtonIsPressedOnceNumberEqualsOne() {
        with(robot) {
            givenTheCurrentValueIsZero()
            whenTheDecrementButtonIsPressed()
            thenVerifyCountIs(-1)
        }
    }

    @Test
    fun givenDecrementButtonIsPressedAndDecrementIsPressedOnceVerifyNumberIsZero() {
        with(robot) {
            givenTheCurrentValueIsZero()
            whenTheDecrementButtonIsPressed()
            whenTheIncrementButtonIsPressed()
            thenVerifyCountIs(0)
        }
    }

    @Test
    fun givenIncrementIsPressedTwentyTimesVerifyCountIsTwenty() {
        val times = 20

        with(robot) {
            givenTheCurrentValueIsZero()
            repeat(times) { whenTheIncrementButtonIsPressed() }
            thenVerifyCountIs(times)
        }
    }
}
It literally is simple as that. We have not created tests that read pretty much like a standard acceptance critera, Given, When, Then. The best bit about this is that we are simply reusing code, we can add as many tests as we like we would still be reusing code. Overall, it leaves thes tests easier to manage, easy to change and just obvious.
As mentioned earlier we can also add these style tests in our unit testing too.
/test/MainViewModelRobot.kt
class MainViewModelRobot {

    private lateinit var viewModel: MainViewModel

    @MockK
    private lateinit var observer: Observer<MainView.ViewState>

    fun setup() {
        MockKAnnotations.init(this, relaxed = true)
        viewModel = MainViewModel()
        viewModel.getViewState().observeForever(observer)
    }

    fun shutDown() {
        viewModel.getViewState().removeObserver(observer)
    }

    fun givenTheCurrentValueIsZero() {
        // NO OP - Default is Zero
    }

    fun whenTheIncrementButtonIsPressed() {
        viewModel.onEvent(IncrementPressed)
    }

    fun whenTheDecrementButtonIsPressed() {
        viewModel.onEvent(DecrementPressed)
    }

    fun thenVerifyCountIs(amount: Int) {
        assertNotNull(viewModel.getViewState().value)
    }
}
/test/MainViewModelTest.kt
class MainViewModelTest {
private val robot = MainViewModelRobot()
@Suppress("unused")
@get:Rule
val instantTaskExecutorRule: InstantTaskExecutorRule = InstantTaskExecutorRule()
@Before
fun setup() {
robot.setup()
}
@After
fun shutdown() {
robot.shutDown()
}
@Test
fun `when increment is pressed, count should be 1`() {
with(robot) {
givenTheCurrentValueIsZero()
whenTheIncrementButtonIsPressed()
thenVerifyCountIs(1)
}
}
@Test
fun `when decrement button is pressed, count should be -1`() {
with(robot) {
givenTheCurrentValueIsZero()
whenTheDecrementButtonIsPressed()
thenVerifyCountIs(-1)
}
}
@Test
fun `when increment then decrement is pressed, count should be 0`() {
with(robot) {
givenTheCurrentValueIsZero()
whenTheDecrementButtonIsPressed()
whenTheIncrementButtonIsPressed()
thenVerifyCountIs(0)
}
}
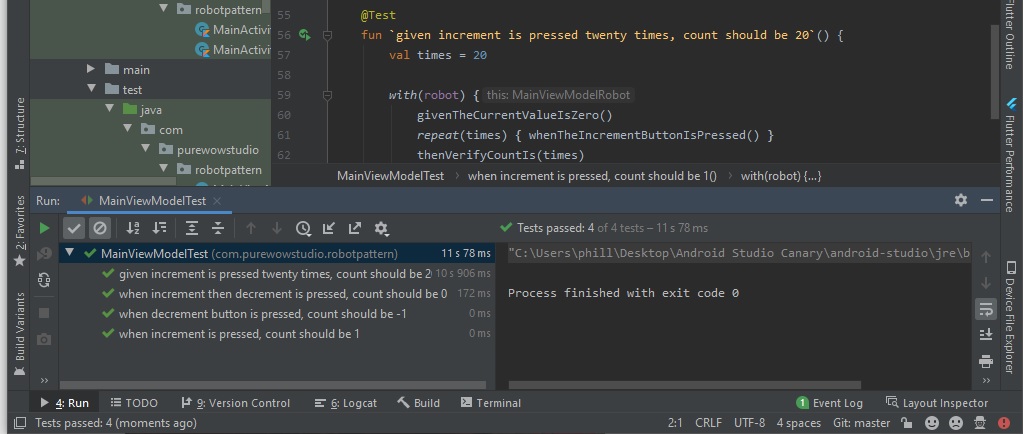
@Test
fun `given increment is pressed twenty times, count should be 20`() {
val times = 20
with(robot) {
givenTheCurrentValueIsZero()
repeat(times) { whenTheIncrementButtonIsPressed() }
thenVerifyCountIs(times)
}
}
}
That’s it! We now how to write tests that are easy to manage, suitable for UI test and Unit testing and can be understand by anybody!
If there’s any comments to make, please let me know or if you have any suggestions give me a shout!
Hope you enjoy.