Uni-directional Flow with MVI
MVI Design Pattern
Yes, another MVx design pattern. I think in all honesty, my favorite.
You might have seen in a few of my recent blog posts pattern that leverages the power of sealed classes to describe Events, ViewState & ViewEffects. We can go more into depth on them shortly.
Supplimental Design Pattern
To start with, I think this statement is probably the most important in my eyes… MVI is a pattern to suppliment other design patterns. What I mean by that is that we can actually implement MVI on top of MVVM, MVP, MVC and pretty much anything else. The reason I say this is because we only need to define, a View, a Business Logic Container (ViewModel, ViewController, Presenter) etc. MVI is more of the communication between the View and the BLC, becuase of that, we can use any base pattern. Due to this it seems to be trend to use Android ViewModel as it adds lifecycle awarness and ensures our state survives configuration changes.
Uni-Directional Flow
Simply put, we call this communication in this instance, Uni-Direction Flow. The User interacts with the View, the View sends the Event (Intent) to the BLC. The BLC does whatever logic it needs to do, updates an observable object labelled ViewState, the View is observing this ViewState object and updates itself as necessary. ViewState simply put is the state of the view modelled. Example, if we had a TextView called username and a TextView called age, the ViewState would be a data class with String username and Int age. The View would read the ViewState and set the username TextView as ViewState.username and age as ViewState.age. As the View observes the BLC we have a fairly decouple logic and it acts in a reactive manner. Along side ViewState we have ViewEffect, these are things such as Navigation and messaging, single events essentially. Anything that can’t be dealt with in the BLC due to Context or Framework dependant logic, we leave that up to the Activity/Fragment to sort. Here is what I feel this looks like as a diagram.

Implementation
Let’s begin with mapping out our ViewState, ViewEffects & Events. In this blog we will be creating a simple app that counts, has 2 buttons, increment, decrease and also a SnackBar when the number equals 10. Let’s begin.
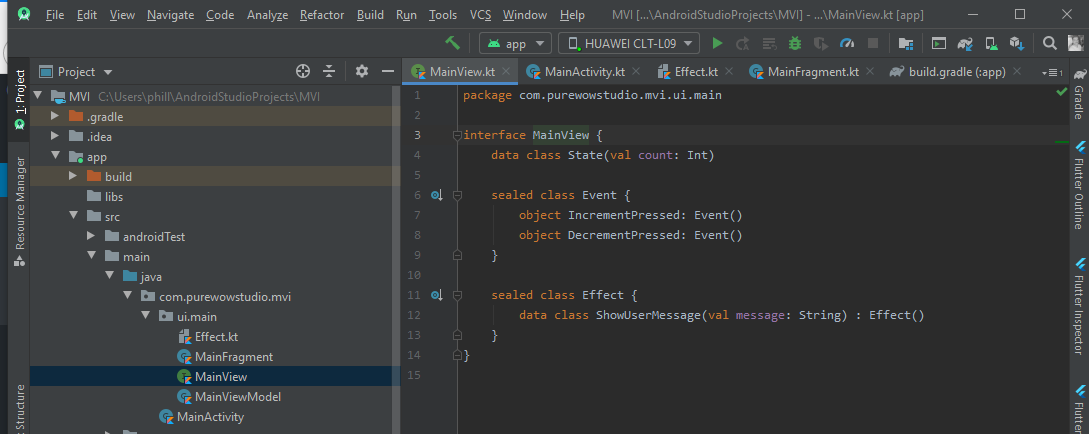
MainView.kt
interface MainView {
    data class State(val count: Int)

    sealed class Event {
        object IncrementPressed: Event()
        object DecrementPressed: Event()
    }

    sealed class Effect {
        data class ShowUserMessage(val message: String) : Effect()
    }
}
This MainView.kt for me is the best part about MVI. It creates almost like an Index that we can use to understand everything within a View. It has the State it has the Events and it has the Effects. This literally describes the possibles state of the View. It describes the events that can happen through user interaction and also describes what the navigation/other states that happen as an Effect of the user interaction.
MainFragment.kt
class MainFragment : Fragment() {

    companion object {
        fun newInstance() = MainFragment()
    }

    private val viewModel: MainViewModel by viewModels()
    private lateinit var rootView: View

    override fun onCreateView(
        inflater: LayoutInflater,
        container: ViewGroup?,
        savedInstanceState: Bundle?
    ): View {
        rootView = inflater.inflate(R.layout.main_fragment, container, false)
        return rootView
    }

    override fun onActivityCreated(savedInstanceState: Bundle?) {
        super.onActivityCreated(savedInstanceState)
        observeViewModel()
        addEventListeners()
    }

    private fun observeViewModel() {
        viewModel.viewState.observe(this, Observer(::updateUI))
        viewModel.viewEffects.observe(this, EffectObserver(::handleEffect))
    }

    private fun renderUI(viewState: MainView.State) {
        textCount.text = "${viewState.count}"
    }

    private fun handleEffect(effect: MainView.Effect) {
        when (effect) {
            is ShowUserMessage -> showSnackBar(effect.message)
        }
    }

    private fun showSnackBar(message: String) {
        with(Snackbar.make(
                rootView,
                message,
                Snackbar.LENGTH_LONG)) {
            show()
        }
    }

    private fun addEventListeners() {
        buttonIncrement.setOnClickListener {
            viewModel.onEvent(IncrementPressed)
        }

        buttonDecrement.setOnClickListener {
            viewModel.onEvent(DecrementPressed)
        }
    }
}
As mentioned earlier. We have a Fragment, it has the following responsabilities:-
- RenderUI – This function is called everytime the the State is updated. Put simply, this is called View State Modelling. We have a data class that contains all the properties needed to populate all the views. As we are using LiveData this will ensure that during a configuration change, we will have the fields correctly populated.
- HandleEffect – You might notice that in this instance we are using something called an EffectObserver. This is a wrapper class that will act similar to LiveData but will ensure upon configuration changes, this isn’t ran again. The reason for this being is that Effects are one shot. We don’t need to navigate twice, or show a Snackbar twice.
- Sending Events – When a user driven events takes place, we send an excplicit event to the ViewModel via it’s public onEvent function. This describes exactly what event is taking place.
MainViewModel.kt
class MainViewModel : ViewModel() {

    private val effect: MutableLiveData<Effect<MainView.Effect>> = MutableLiveData()
    private val state: MutableLiveData<MainView.State> = MutableLiveData()

    val viewState: LiveData<MainView.State> = state
    val viewEffects: LiveData<Effect<MainView.Effect>> = effect

    init {
        updateViewState(MainView.State(0))
    }

    fun onEvent(event: MainView.Event) {
        when (event) {
            is IncrementPressed -> incrementCount()
            is DecrementPressed -> decrementCount()
        }
    }

    private fun dispatchEffect(effect: MainView.Effect) {
        this.effect.value = Effect(effect)
    }

    private fun updateViewState(state: MainView.State) {
        this.state.value = state
    }

    private fun incrementCount() {
        viewState.value?.let {
            val updatedCount = it.count + 1

            updateViewState(it.copy(count = updatedCount))

            if (updatedCount == 10)
                dispatchEffect(ShowUserMessage("You reached 10!"))
        }
    }

    private fun decrementCount() {
        viewState.value?.let {
            updateViewState(it.copy(count = it.count - 1))
        }
    }
}
So let’s run through the core elements in our ViewModel:-
- ViewState – We have our private MutableLiveData and public LiveData which contain out ViewState and our Effects. Were using LiveData to ensure that we survive configuration changes and we also use a wrapper for Single Events which I will post below.
- One Public Facing Function – To ensure we have uni-directional flow, we ensure this is only one function for communication to the ViewModel. This function accepts an Event which we then handle in our ViewModel. By having one input, and one output, we create a flow that ensures a circular flow.
- Immutable ViewState – By leveraging Kotlins shallow copy, we can decide which params need changing. We therefore copy the original ViewState, only change the field we need to change and we create a single intance of ViewState. This ensures immutablity and forces us to not get into some weird place were we have more than one state. We have an internal function that updatesViewState
- Dispatch Effect – If we were to do a single event we simply create an effect and pass it to dispatchEffect
And that is all! I will post this code to GitHub and you can try it yourself.
As stated earlier we use a wrapper for single events, which you can find here.
import androidx.lifecycle.Observer

/**
 * Used as a wrapper for data that is exposed via a LiveData that represents an event.
 */
open class Effect<out T>(private val content: T) {

    var hasBeenHandled = false
        private set // Allow external read but not write

    /**
     * Returns the content and prevents its use again.
     */
    fun getContentIfNotHandled(): T? {
        return if (hasBeenHandled) {
            null
        } else {
            hasBeenHandled = true
            content
        }
    }

    /**
     * Returns the content, even if it's already been handled.
     */
    fun peekContent(): T = content
}

class EffectObserver<T>(private val onEffectUnhandledContent: (T) -> Unit) : Observer<Effect<T>> {
    override fun onChanged(effect: Effect<T>?) {
        effect?.getContentIfNotHandled()?.let {
            onEffectUnhandledContent(it)
        }
    }
}